From Trailmeister.com
Carry a small amount of steel wool and a good smoke alarm (nine volt) battery and also some toilet tissue, in case you need a fire. Stick the battery ends into the steel wool. The steel wool will short circuit the battery and turn red hot, thus causing the toilet tissue (or other dry tinder) to ignite.
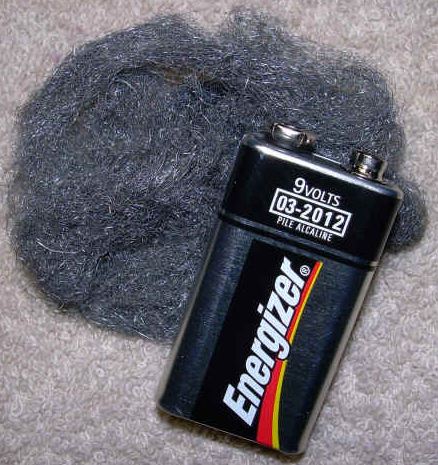 Creating fire is the primal act of an outdoorsman and everyone that ventures beyond the safety of the trailhead should know how to start a fire without matches. It’s an essential survival skill.
While the chances of carrying steel wool and a nine volt battery in a perhaps fairly low, the skill of making fire, without matches, should be practiced; just in case. Here are a few other methods by which you can create fire in an emergency.
You never know when you’ll find yourself in a situation where you’ll need a fire, but you don’t have matches. Maybe your horse wanders off during a break with all of your gear. Or you fall off and the horse leaves you. Hopefully you’ll never need to use them but regardless it’s damn cool to know that you can start a fire wherever and whenever you want.
We’ll start with the most primal and move into some just plain nifty ways to make fire that you may not have heard of.
Hand Drill – The hand drill fire making method
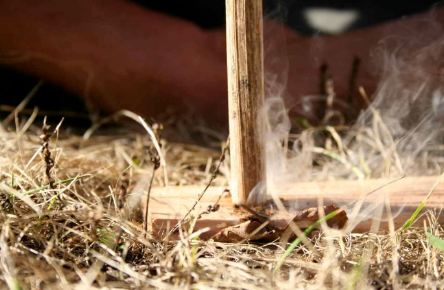
Tom Hanks’ role in Cast Away notwithstanding, the hand drill method of making fire is the most difficult, most primitive, and the most primal. If you’ve got dry wood, and an abundance of determination, you too can make fire in this manner.
- Make a tinder nest to nurture the tiny glowing ember that you’ll eventually create. The tinder nest can be anything that catches fire easily such as lint, grass, or shredded bark.
- Make a board from a dry piece of wood with a v shaped notch at the edge and a small depression next to it. This is your fireboard.
- Place a piece of bark or a dry leave under the notch to catch the ember that you’ll be creating.
- Take a dry branch a couple of feet long (this is the spindle) and place it into the aforementioned depression on the fireboard.
- Start spinning. Maintain a constant downward pressure on the spindle as you roll it between your hands. Do this long enough and the friction will create enough heat to form a small ember.
- When you see a glowing ember, tap the fire board to drop you ember onto the piece of bark. Transfer the bark to your nest of tinder. Gently blow on it to start your flame.
Flint and Steel – “I started a fire with flint and steel.”
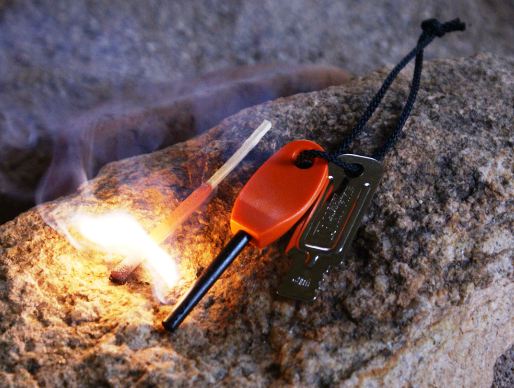
There are two very different processes that are being referred to when talking about flint and steel:
- Old School – Traditional Flint and Steel: Striking a hardened piece of carbon steel with a very hard rock, often flint, to generate sparks.
- New School – Ferrocerium (think synthetic flint): Scraping a “magic” stick with something “sharp”( you did remember to bring a pocketknife?) to generate sparks.
Why do we care about this distinction? You can light “almost anything” with the new school ferrocerium tools available while there are very few things that will readily accept a spark from the old school, but traditional, flint and steel. We’ll stick with the ferrocerium method for its dependability. These products (With trade names such as: Swedish Fire Steel, Blastmatch, and Metal-Match) can be found in practically any outdoors or convenience store and are a favorite of survival experts, fishermen, and campers for a fool proof way to light anything from fires to stoves and gas barbecues with a shower of 3,000°C (5400°F) sparks.
Lens Based Methods
Using a lens to start a fire is an easy matchless method, just ask any young boy who has melted plastic army men with a magnifying glass on a sunny day. Of course the drawback to the lens based method is that it only works when you have sun. So if it’s night time or overcast, you won’t have any luck.
Traditional Lenses
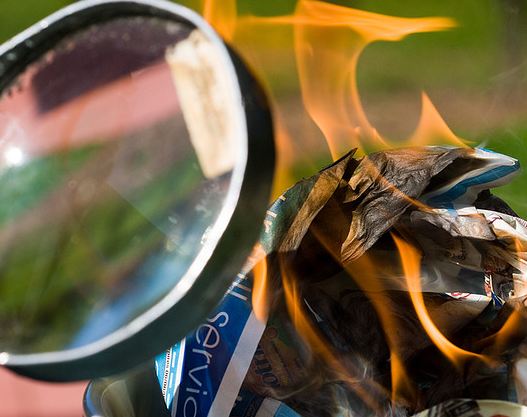
For those of us who don’t carry a magnifying glass in our saddlebags; eyeglasses, or binocular lenses will also work. Simply angle the lens towards the sun in order to focus the beam into as small an area as possible. Put your tinder nest under this spot and you’ll soon have yourself a fire.
Here’s a really cool and effective lens based method that will also start a fire
Fire and Ice
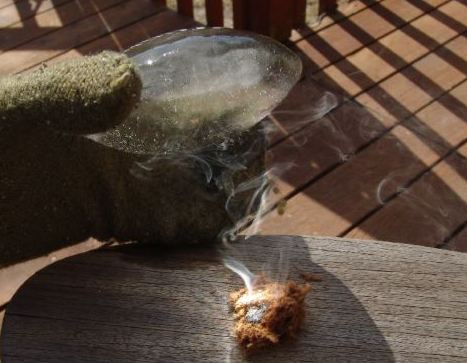
You can actually make fire from a piece of ice. All you need to do is form the ice into a lens shape and then use it as you would when starting a fire with any other lens. Of course with this method you’ll need both a sunny day, below freezing temperatures and crystal clear water. This is a fun method to play with but it’s much easier to remember to bring along a lighter.
- Get clear water. For this to work, the ice must be clear. Fill a bowl or cup clear water and let it freeze until it forms ice. Your block should be about 2 inches thick.
- Form your lens into a convex shape. Use a knife to shape the ice into a lens shape that is thicker in the middle and narrower near the edges.
- Polish your lens. After you get the rough shape of a lens, finish the shaping of it by polishing it with your hands. The heat from your hands will melt the ice enough so you get a nice smooth surface.
- Angle your ice lens towards the sun just as you would any other lens. Focus the light on your tinder nest and watch as your fire comes to life.
Coke Can and Chocolate Bar
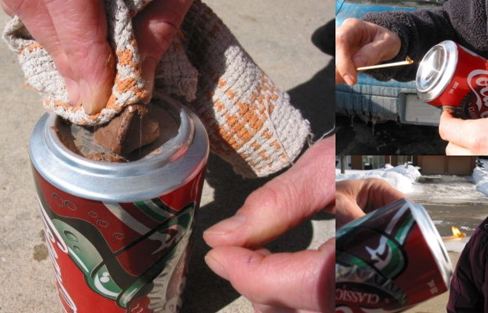
Yes, a soda can, chocolate bar, and a sunny day will make fire.
- Use the chocolate bar to polish the bottom of the soda can. The chocolate will make the bottom of the can shine like a mirror. This will take a while and tooth paste will polish more quickly, but doesn’t sound nearly as nifty!
- After polishing the bottom of your can, you’ll have essentially a parabolic mirror. Sunlight will reflect off the bottom of the can, forming a single focal point.
- Point the bottom of the can towards the sun. You’ll have created a highly focused ray of light aimed directly at your tinder. Place the tinder about an inch from the reflecting light’s focal point and soon you’ll have a flame.
This article appears courtesy of Trailmeister.com, The Horse Rider’s Resource. Visit their website for more articles, tips and reviews.




4 comments
Skip to comment form
awesome article! will print out and put in a binder.
Ranger W,
What class brother? 0909 here
RLTW!
KISS- Keep It Simple Stupid/Sir, the disposable lighter is by far the best thing to carry, keep several in different parts of your gear, including your pocket! You have spark and controlled flame at the flick of your thumb! Most other methods (especially primitive) are tedious at best! Do practice them, it can be fun and MAY someday come in handy, but don’t risk your butt (or your families) on them. Using a hand drill can be helped with a little cordage; just make a groove in the top of your drill stick,place a length of cord (boot lace) in the groove, tie the center of the cord to the stick top and make a loop in both ends for your thumbs. This will allow you to maintain constant downward pressure on the drill stick as you spin it back and forth and not have to keep moving your hands back up the stick, and thus losing friction and heat! Things like 9V batteries, steel wool, magnifying glass, Ice lens (REALLY), etc., unless they have another good use, are really not IMHO worth carrying! Good Luck and happy prepping! (GLAHP)
We stumbled over here by a different web page and thought I might check things out. I like what I see so now i am following you. Look forward to looking over your web page yet again.